The 3D sculpting manual
Digital sculpting from the beginning — what it is, how to learn it, and how to do it in Mold. Chapters run in the order the questions arrive: what sculpting is, your first sculpt, the brushes worth knowing, resolution and topology, then projects like a head or a model for 3D printing.
Start here
What digital sculpting is
Digital sculpting is 3D modelling done the way you would work clay. Instead of placing vertices, drawing edge loops and extruding faces, you take a lump of material and push it, pull it, smooth it, pinch it and carve into it with brushes. The computer keeps track of the millions of triangles underneath; you think about form.
That difference matters more than it sounds. Traditional or "hard-surface" modelling is a technical craft — it rewards planning, precision and an understanding of topology, and it is the right tool for a chair, a wrench or a building. Sculpting is an intuitive craft. It rewards observation and repetition, and it is the right tool for anything organic: a face, a creature, a hand, folds of cloth, a rock, a tree.
Most 3D artists end up using both, and the two meet in the middle: you sculpt the form you want, then rebuild clean geometry over it (retopology) so it animates and renders efficiently. Mold does the sculpting half, and hands the result to Mixos Paint for texturing.
Sculpting vs. modelling, in one line
If you can describe the object with measurements, model it. If you can only describe it by looking at it, sculpt it.
Is 3D sculpting hard to learn?
Less than most people expect, and for a specific reason: sculpting borrows an intuition you already have. You have pressed a thumb into clay or dough, you know what happens when you smooth a bump, and that knowledge transfers almost directly. Beginners are usually making recognisable shapes inside an hour — which is emphatically not true of traditional polygon modelling, where the first hour is spent learning what an edge loop is.
What is genuinely hard is the same thing that is hard about drawing: seeing accurately. Getting a face to read as a particular person, or a hand to look like a hand rather than a glove, takes the same practice a pencil would. No software shortens that, and anyone who tells you otherwise is selling something. The good news is that it is practice, not talent — it accrues.
The other traditional barrier is not artistic at all, it is logistical. Sculpting software has historically meant a licence, a download, a machine that can run it, and a driver situation. A large share of people who want to try sculpting never make a single stroke because they stall somewhere in that chain. Mold exists on the other side of it: open a tab, and you are sculpting.
The honest first-week expectation
Week one you will make blobs. That is the correct output for week one — everyone's first sculpts are blobs. Aim for volume of attempts rather than quality of any single one, and re-sculpt the same subject three times rather than labouring over it once.
What you need to run Mold
A browser that provides WebGPU, the modern graphics API built into current browsers. In practice that means an up-to-date Chrome, Edge, Firefox or Brave on macOS, Windows, Linux or ChromeOS, and Safari 26+ on macOS and iPadOS. There is nothing to download, no plugin, and no driver to keep current. If your browser cannot provide WebGPU, Mold tells you when you arrive rather than failing halfway through a stroke.
Because the engine is the browser's, the device list is unusually wide for a sculpting tool. Desktops and laptops are the comfortable case, with a mouse, a trackpad or a pressure-sensitive tablet. On iPad the layout switches to a touch-first arrangement and Apple Pencil pressure and tilt drive the brushes directly. Android phones and tablets on a current Chrome work the same way. Chromebooks — which cannot run desktop sculpting packages at all — run Mold as long as ChromeOS supplies WebGPU.
Hardware still matters for how far you can push a sculpt: a dense multi-million-triangle detail pass wants a real GPU, while blockouts and mid-detail work stay comfortable on a tablet. The practical workflow that falls out of this is a pleasant one — rough a shape out wherever you are, and step up the subdivision levels when you are back at a desk. Your sculpts live in your account, so the same file opens on every device.
Free to sculpt — the account is for keeping it
Sculpting in Mold costs nothing — every brush, every subdivision level, remeshing, masking, symmetry, no time limit and no watermark. A free Mixos account is what saves your sculpts to your library so they follow you between devices. Downloading the finished mesh as GLB, OBJ or STL is what the paid plans cover.
Your first sculpt, in five minutes
The fastest way to understand sculpting is to make something bad on purpose. Work quickly, do not undo, and follow the five steps below — the point is to feel how the brushes behave, not to produce anything you would keep.
- 1Open Mold with a sphere — Go to Mold. A sphere is the traditional starting point because it has no features to fight — every sculpt is the process of finding a shape inside it.
- 2Block the big shape with Clay — Press 6 for the Clay brush, set a large radius with the [ and ] keys, and build up the broad masses first — a head shape, a body, a rough silhouette. Resist detail. Almost every beginner sculpt fails because the big shapes were never right.
- 3Smooth constantly — Press 3 for Smooth and relax anything lumpy. Experienced sculptors alternate between building and smoothing several times a minute; smoothing is not cleanup at the end, it is half the technique.
- 4Subdivide when the form is right — Press D to add a finer subdivision level. Only do this once the broad shape reads correctly — subdividing early gives you a high-resolution version of a bad shape, which is much harder to fix.
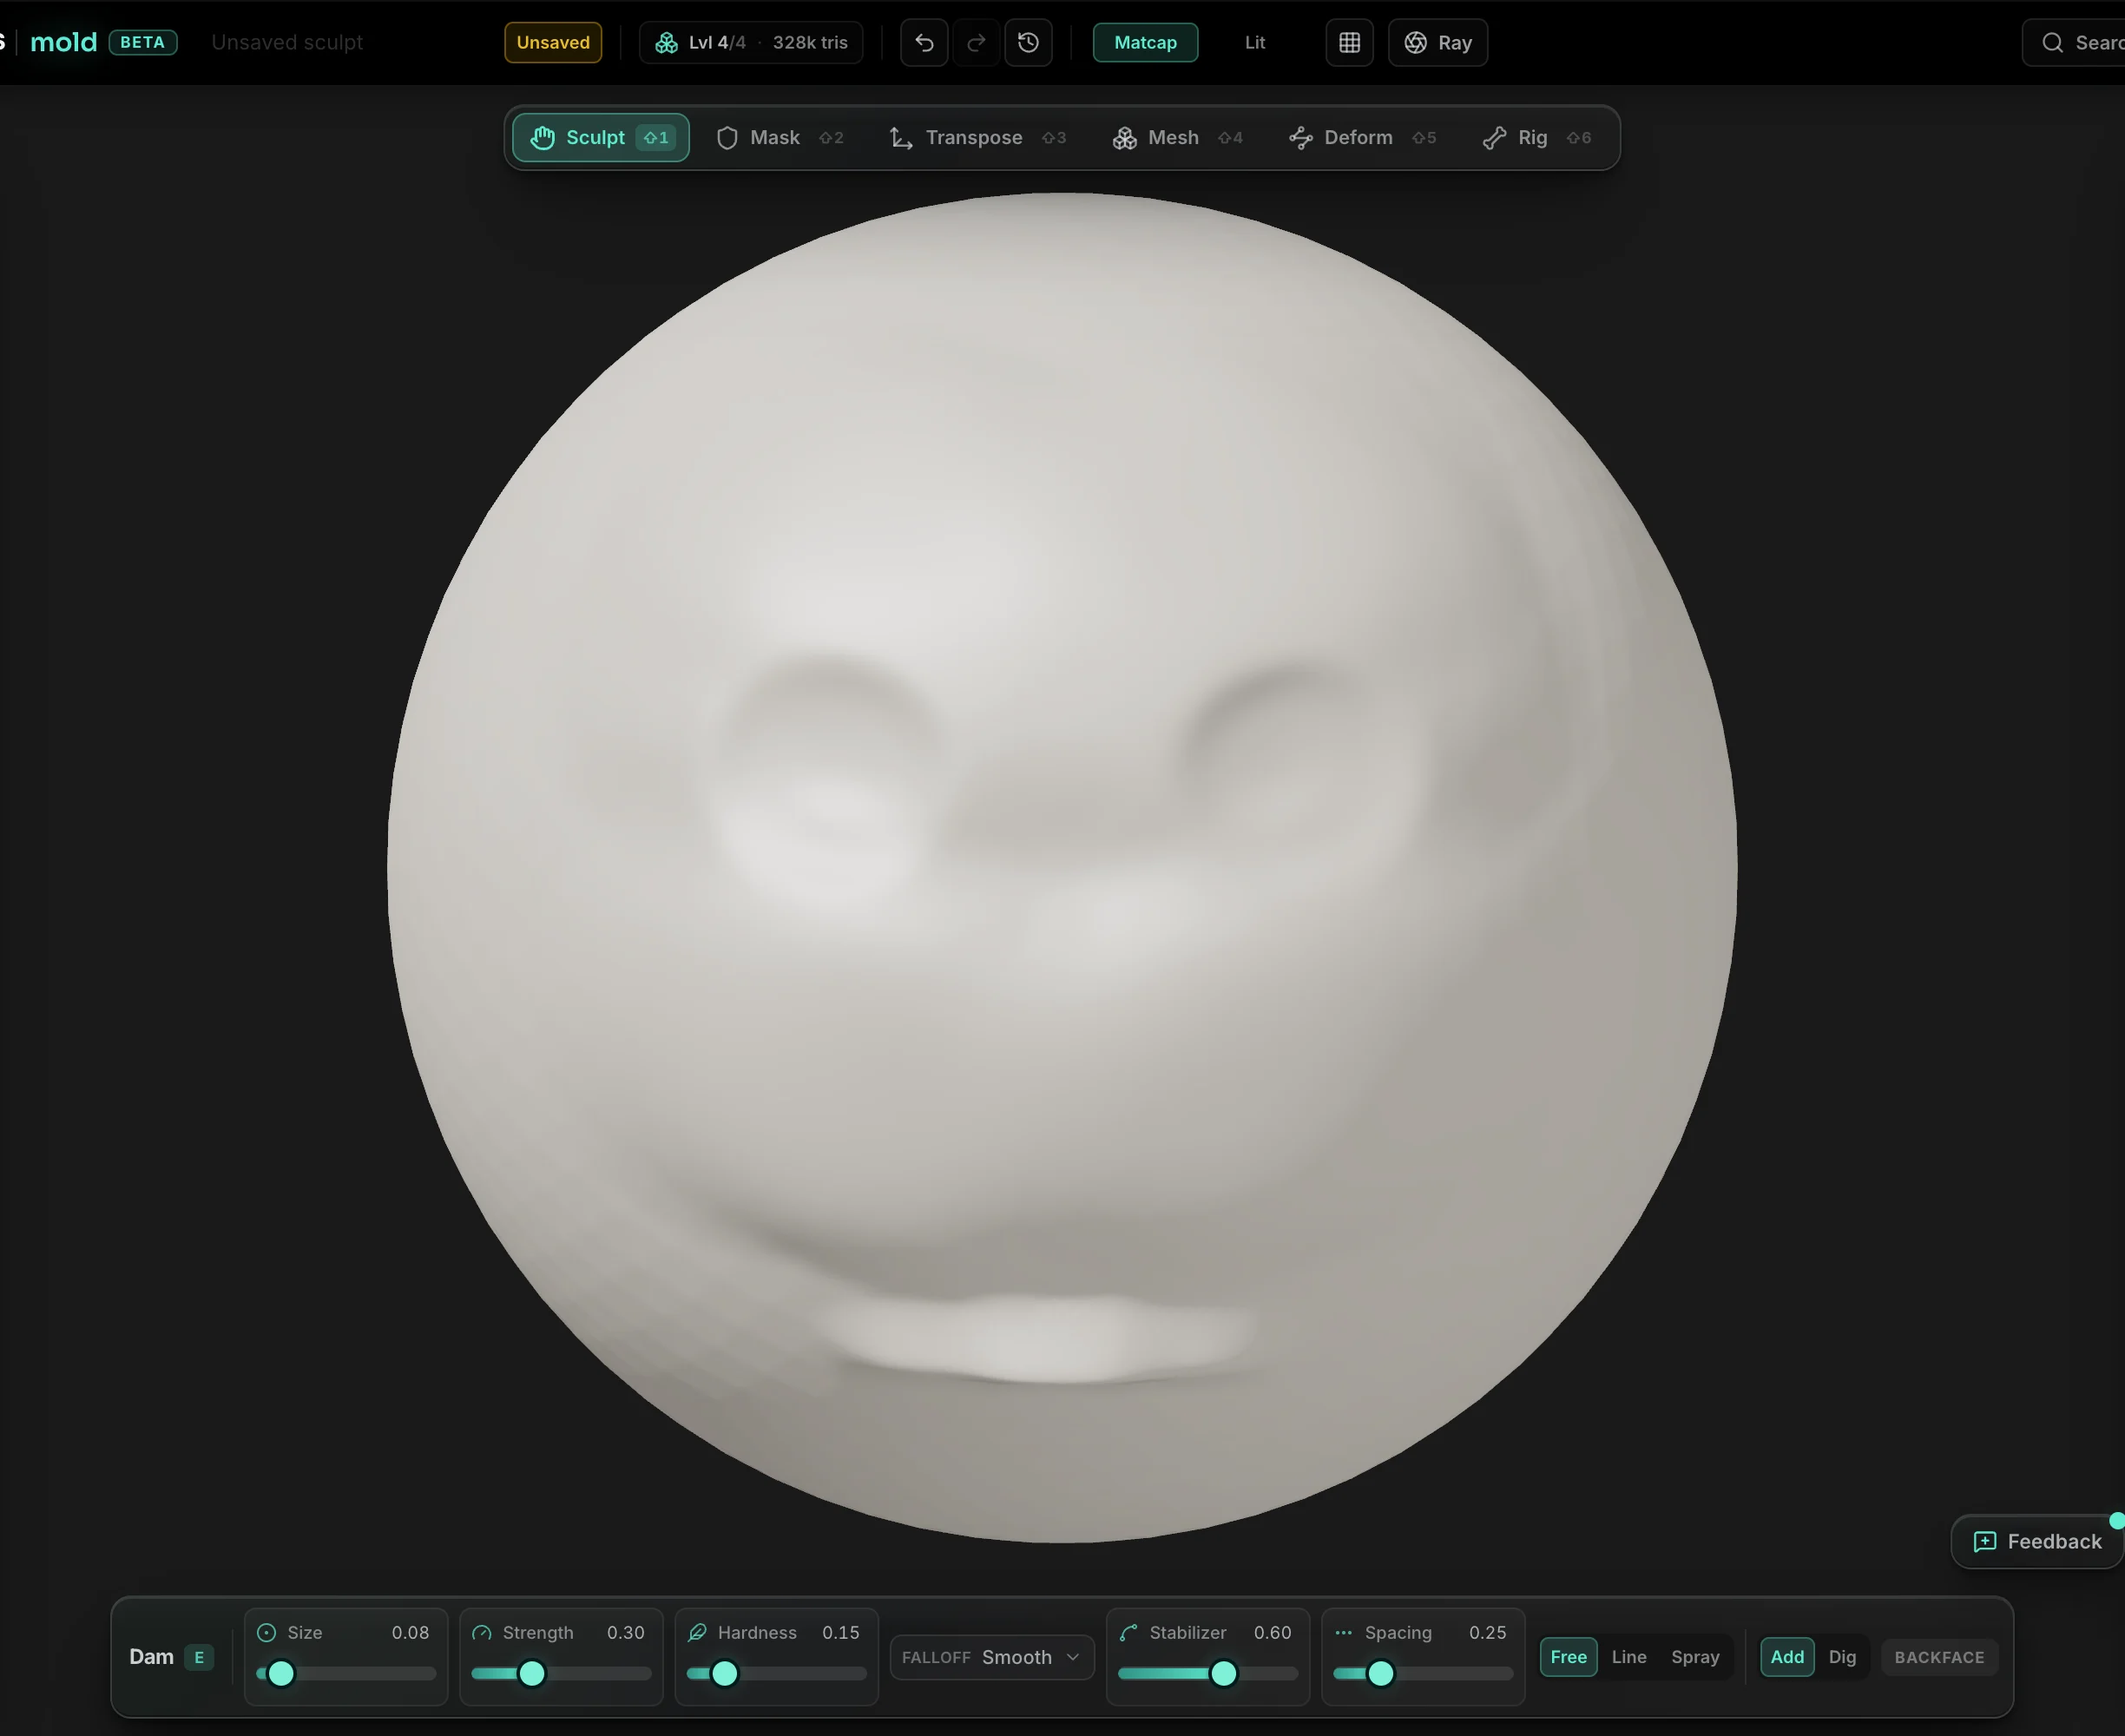
- 5Carve the detail — At the higher level, switch to Dam (E) for sharp crease lines, Pinch (8) to tighten edges, and Crease (9) for ridges. Turn symmetry on with X so both sides get the same treatment.
The one rule worth internalising
Big shapes, then medium shapes, then small shapes — and never move to the next size until the current one reads. Detail added over a wrong silhouette is wasted work, because fixing the silhouette destroys the detail.
How to learn 3D sculpting
There is a reliable path through this, and it is much shorter than the amount of tutorial content in the world suggests. Most people stall not from lack of material but from studying tools instead of practising form. The sequence below is the order that works.
- 1Learn six brushes, not sixty — Clay, Smooth, Move (Grab), Dam, Pinch and Flatten will carry you through your first several months. Every other brush in Mold is a convenience that one of those six could approximate. Learning the full catalogue first is the single most common way to waste a month.
- 2Sculpt primitives from observation — An egg. An apple. A pebble. A pear. These sound trivial and are not — they teach you to judge silhouette and surface transitions with nothing to hide behind. Do ten.
- 3Move to anatomy in parts — A nose. An ear. An eye and its socket. A hand. Parts before wholes, always: a head sculpted by someone who has never sculpted an ear separately will have a bad ear, every time.
- 4Sculpt a skull before a face — This is the step people skip and the one that pays most. A face is a soft surface draped over hard landmarks — brow ridge, cheekbone, jaw, temple, the mastoid behind the ear. Sculpt the skull once and every subsequent head sculpt improves, because you finally know what is underneath.
- 5Copy a master, then work from reference — Re-sculpt an existing piece you admire to feel the decisions, then move to photographs. Use Mold's reference panel to keep images beside the viewport rather than sculpting from memory — sculpting from memory is how you learn your own mistakes very thoroughly.
- 6Finish things — A finished mediocre sculpt teaches more than five abandoned promising ones, because only finishing forces you through the parts you are avoiding.
Give it about three months of regular short sessions rather than occasional long ones. Thirty minutes daily beats a five-hour Saturday, because sculpting improvement is mostly perceptual and perception consolidates between sessions.
On anatomy books
One good artistic-anatomy reference will outperform any amount of software tutorial once you are past the first fortnight. The classic texts by Bridgman, Goldfinger or Hampton are all aimed at exactly this problem and none of them mention a computer.
The workspace
The six modes
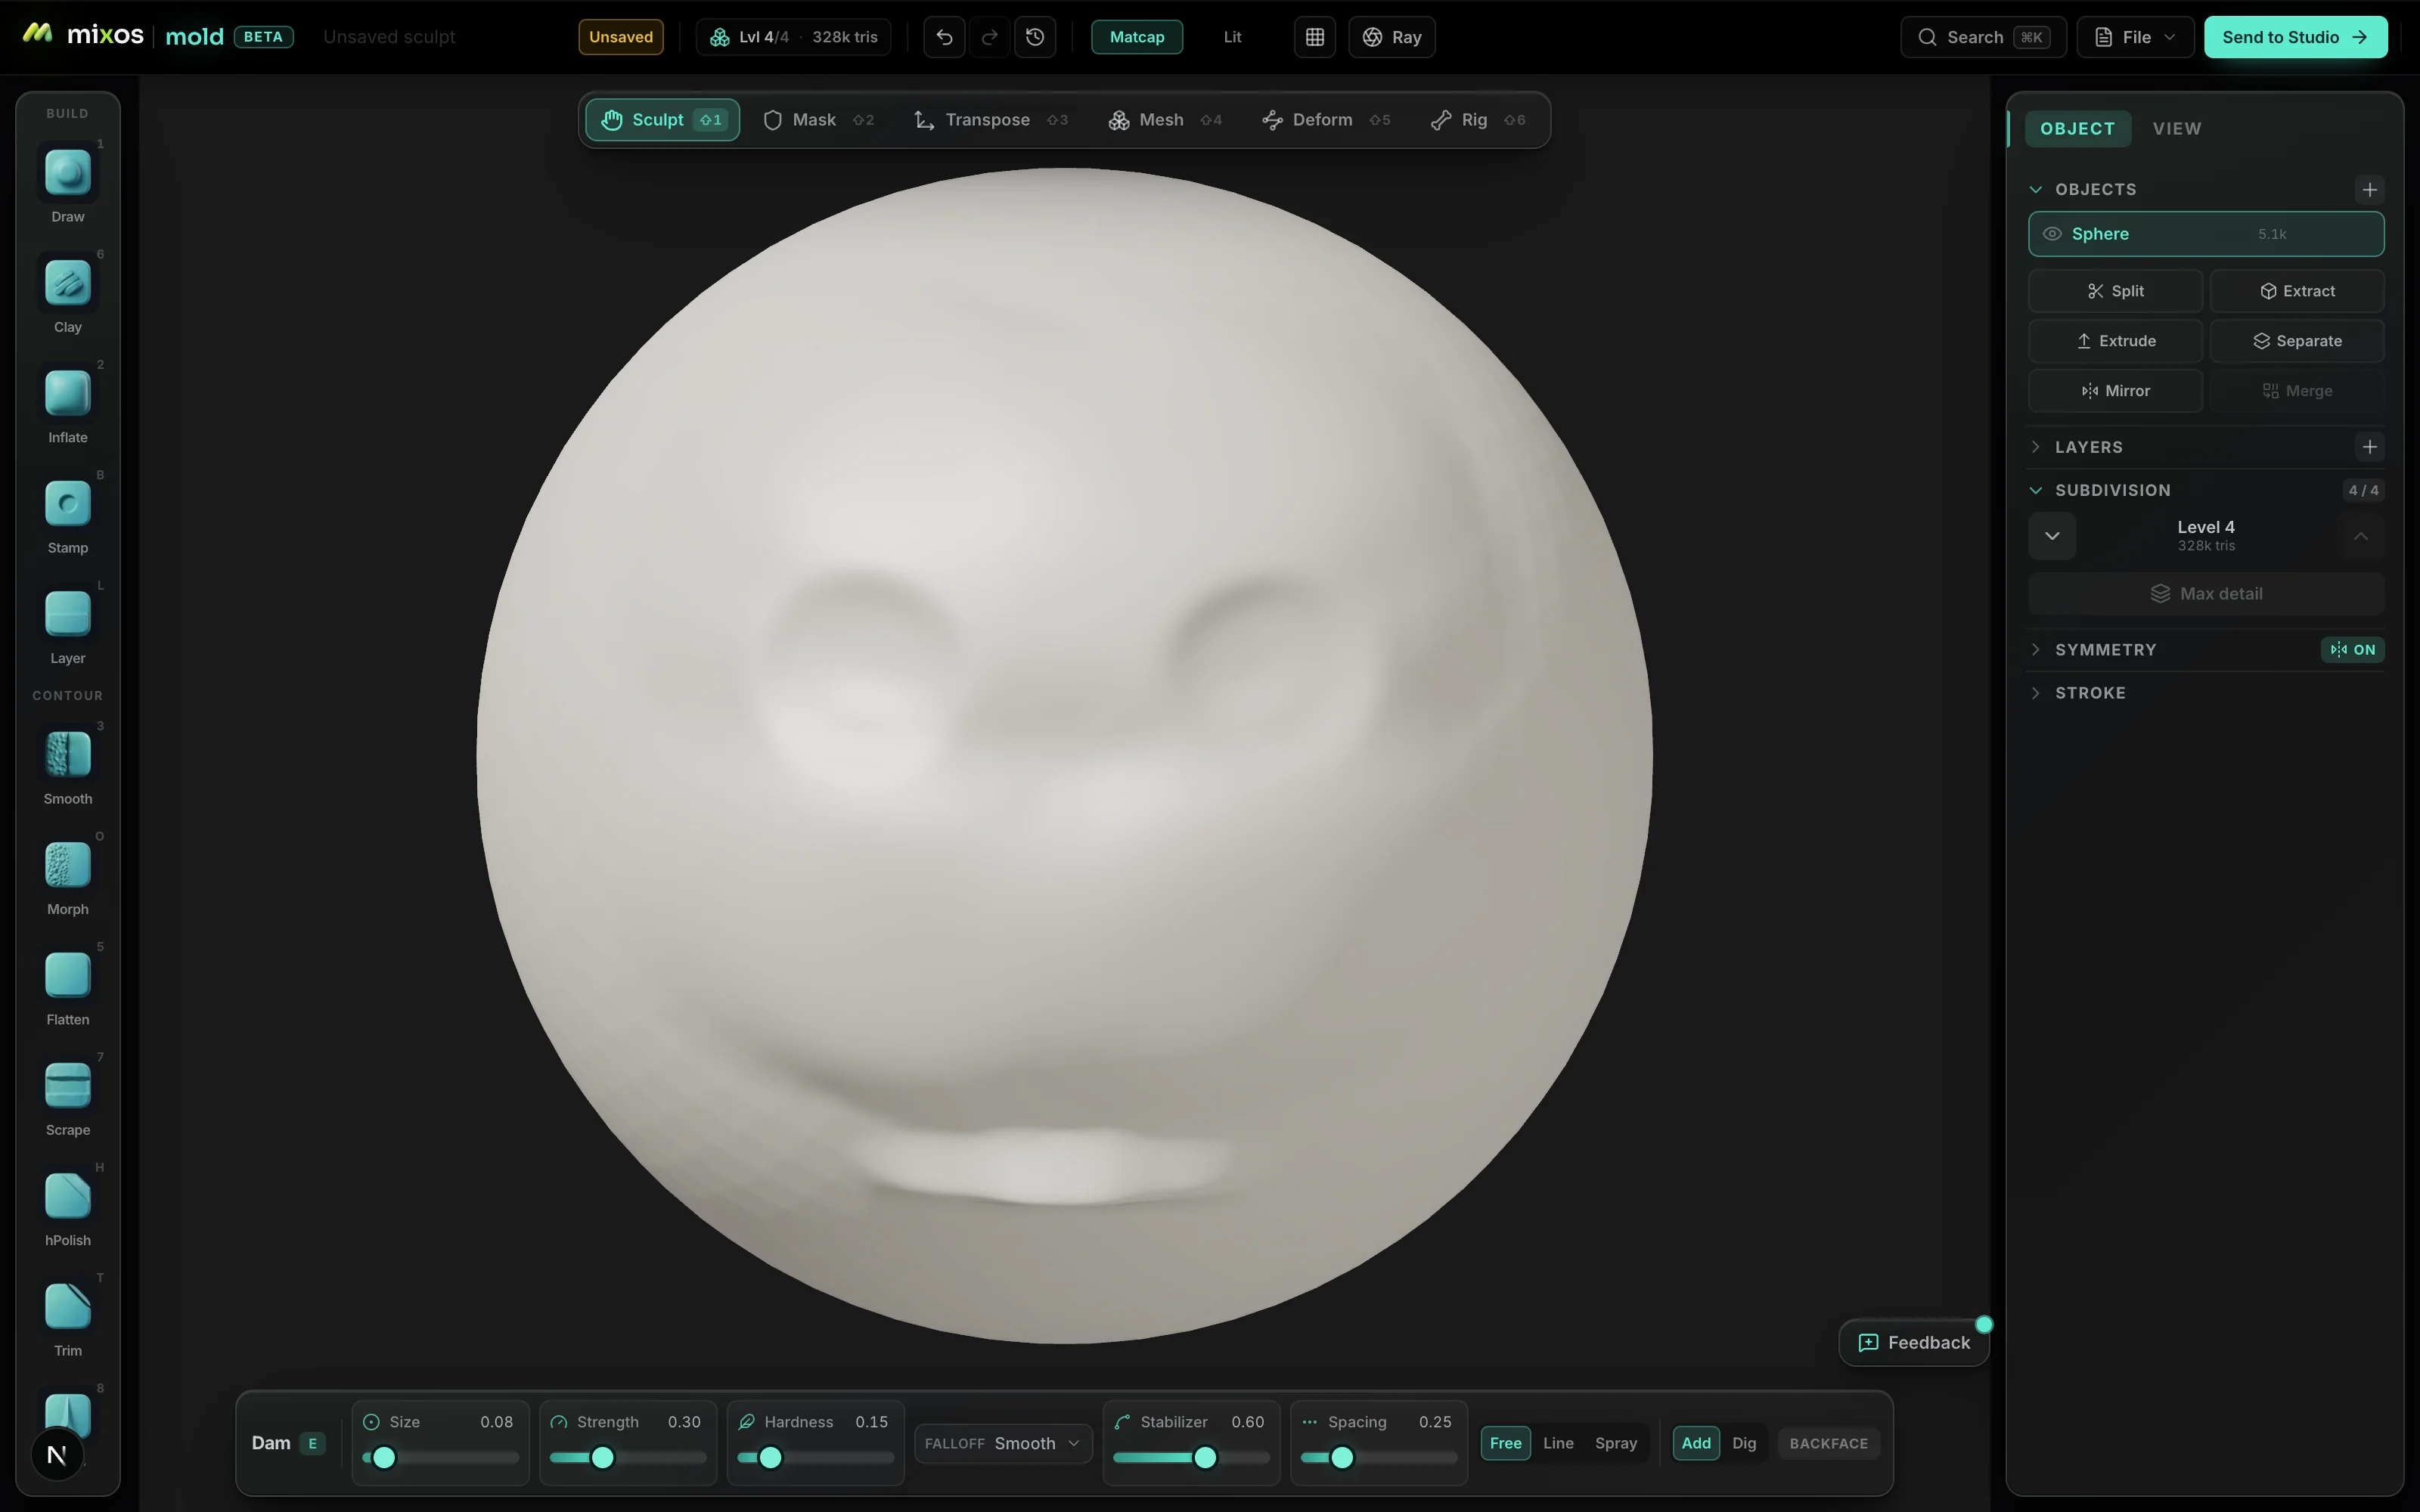
Mold's interface is organised around six modes, on a rail you can reach with Shift and a number. Each mode swaps the tool bar for the tools that belong to it, so the controls in front of you are always the ones the current job needs.
Modes
- Sculpt — shape the surface with brushes
- ⇧1
- Mask — protect part of the model
- ⇧2
- Transpose — move, rotate, scale a region
- ⇧3
- Mesh — subdivide, remesh, decimate, boolean, trim
- ⇧4
- Deform — bend, twist, taper, inflate, noise
- ⇧5
- Rig — build a skeleton, bind it, pose it
- ⇧6
Sculpt mode is where you will spend most of your time, and the other five exist to serve it. Mask sets up which part of the model the next operation is allowed to touch. Transpose repositions whole regions once they are masked. Mesh is the structural department — the one-shot rebuilds that change how much geometry you have. Deform reshapes the entire object at once. Rig turns a finished sculpt into something posable.
Objects and references
A Mold scene holds multiple objects, each with its own geometry, subdivision levels and history. Mold ships nine primitives to start from — sphere, box, capsule, ellipsoid, cylinder, cone, torus, disk and plane — and you can import your own mesh to sculpt on instead.
Objects are the right way to handle anything that is separately shaped: eyes, teeth, horns, armour plates, a base. Sculpting them into one continuous surface is a beginner reflex that costs you later, because every remesh then has to reconcile shapes that were never meant to touch.
The reference panel pins images beside the viewport. Use it. Sculpting a head from memory is a reliable way to produce something that looks like a head you half-remember, and the fix is embarrassingly simple: put a photograph next to it, preferably front and profile.
Brushes
The brush and its settings
Every brush shares the same handful of controls, and understanding those four matters far more than memorising the brush list.
Size is the radius of influence — bracket keys nudge it, and it is the setting you will change most often. Hardness shapes the falloff from the centre of the brush to its edge; soft falloffs build gentle mass, hard falloffs cut definite edges. Strength is how much a single dab moves the surface. Spacing controls how densely dabs are laid along a stroke.
There is also a Stabilizer, which smooths the path of your cursor before it reaches the surface. On a trackpad or a shaky hand it is the difference between a wobbling crease line and a clean one, and it costs nothing to leave on for detail work.
Strokes come in three flavours: Free follows the cursor, Line constrains to a straight run between press and release, and Spray scatters dabs within the radius for texture rather than form. Pressure from a Wacom or an Apple Pencil modulates strength automatically.
Size and strength are not interchangeable
A big soft brush at low strength and a small brush at high strength do very different things to a form. Reach for size when you are changing the shape, and strength when you are changing the surface.
Every brush, and what it is for
Mold's brushes fall into four families. The number and letter keys select them directly.
Build — add material
- Clay — build up in flat strata (the workhorse)
- 6
- Draw — raise a smooth bump along the normals
- 1
- Inflate — balloon the surface outward
- 2
- Layer — raise a flat terrace of uniform height
- L
- Stamp — press an alpha shape onto the surface
- B
Contour — refine the surface
- Smooth — relax and soften under the brush
- 3
- Flatten — plane toward the average height
- 5
- Scrape — trim everything above the plane
- 7
- hPolish — polish flat, keep hard edges crisp
- H
- Trim — shave clean flat facets
- T
- Pinch — draw material together to sharpen
- 8
- Crease — pinch a sharp ridge
- 9
- Dam — draw a thin sharp crease line
- E
- Morph — brush back toward a stored state
- O
Move — push mass around
- Grab — drag a region with the cursor
- 4
- Snake — pull out a spike, horn or limb
- K
- Nudge — slide material along the stroke
- N
- Twist — swirl around the brush normal
- 0
Mask
- Mask — paint protection onto the surface
- M
If that list feels long, ignore most of it. Clay to build, Smooth to relax, Grab to move mass, Dam to cut a line, Pinch to sharpen it and Flatten to establish a plane will produce a complete sculpt. Add the rest as you meet the problems they solve.
Morph is an undo you can paint
Store the current surface state, experiment freely, then brush with Morph (O) to fade any region back to what it was. It is far more useful than sequential undo for detail passes, because you can keep the parts of an experiment that worked.
Resolution & topology
Subdivision and multiresolution
A sculpt needs triangles to hold detail — you cannot carve a pore into a surface that only has a hundred vertices. Subdivision splits every face into finer ones, and pressing D adds a level. Each level roughly quadruples the triangle count, so levels escalate fast: a few divisions take a starting sphere into the millions.
What makes this workable is multiresolution: Mold keeps every level, and the comma and full-stop keys step down and up between them. Changes at a low level propagate up to the detail you have already carved, which is the single most useful behaviour in sculpting. It means a proportion mistake found late is not fatal — drop to level two, move the jaw, come back up, and the pores are still there.
Resolution
- Subdivide — add a finer level
- D
- Step down a level
- ,
- Step up a level
- .
- Toggle the wireframe overlay
- W
Do not subdivide to fix a bad shape
More triangles never rescue a wrong silhouette; they just make it expensive to change. If a form is not reading, step DOWN a level and fix it there.
Dynamic topology
Uniform subdivision gives every part of the model the same density, which is wasteful — a smooth cheek does not need the resolution an eyelid does. Dynamic topology takes the other approach: it adds triangles under the brush as you work, only where you are actually sculpting.
This is what makes it possible to pull a horn out of a sphere. Stretching the surface that far with fixed topology just smears the existing triangles into unusable slivers; with dynamic topology, new geometry is created to fill the gap as the form extends. Any time you are inventing shape rather than refining it, this is the mode you want.
The trade-off is that dynamic topology produces uneven, triangular geometry with no subdivision-level history. The usual workflow is therefore to sculpt freely with it, then remesh into something clean when the shape has settled. There is more on the concept in what is dynamic topology.
Remeshing and rebuilding
Mesh mode holds the structural operations — the ones that throw away your topology and build new topology in its place. They are the tools that let a sculpt keep going when the geometry underneath has become a mess.
- 1Remesh (voxel) — Rebuilds the whole surface as uniform topology, the operation ZBrush calls DynaMesh. This is the reset button for a stretched, tangled or self-intersecting sculpt, and it is also what makes a mesh watertight for 3D printing.
- 2Quad — Rebuilds as an all-quad grid rather than triangles. Quads are what most downstream software prefers, and it gives you a clean quad wireframe and a quad OBJ export.
- 3ZRemesh — Adaptive retopology — even, flowing topology that gets denser where the form is detailed and sparser where it is simple. The best general-purpose cleanup of the three.
- 4Project — Snaps a freshly remeshed surface back onto the detail of the pre-remesh version. The standard sequence is remesh, subdivide, then project — new clean topology, old fine detail.
- 5Decimate — Cuts triangle count while preserving the silhouette, keeping density where curvature is high. Use it to get an export down to a sane size.
Remeshing discards your subdivision history
A remesh rebuilds the mesh from scratch, so the level stack that let you step down and fix proportions goes with it. Get the big forms right before you remesh, not after.
What retopology is, and when you need it
Retopology is the act of building new, deliberately clean geometry over a finished sculpt. Sculpting produces enormous, uneven meshes optimised for holding detail; almost everything downstream — animation, game engines, UV unwrapping — wants the opposite, a light mesh with orderly edge flow.
The distinction that saves people time is this: you need retopology when the model has to *deform*. A character that will be rigged and animated needs edge loops that follow the mouth and eyes, or the face will crease in the wrong places. A model that will only ever be rendered still, or 3D printed, very often does not need it at all — a decimated sculpt is fine.
Mold covers the automatic half of this with ZRemesh and Quad remesh, which is enough for stills, printing and background assets. Hand-drawn retopology for a hero animated character is still a job for a dedicated tool, and pretending otherwise would waste your time.
Shaping the whole form
Masking
A mask marks part of the model as protected: brushes, transposes and deforms leave masked areas alone. It is the mechanism behind most controlled sculpting, and skipping it is why beginners keep accidentally denting the piece next to the one they meant to change.
Paint a mask with the mask brush (M), or in Mask mode use Lasso and Box to select an area outright. The common pattern is to mask everything you want to keep, then use a whole-object operation on what is left — mask the head, inflate the body, and only the body moves.
Symmetry
Press X to mirror every stroke across an axis. For anything bilateral — faces, creatures, most characters — leave it on for the whole blocking stage. It halves the work and, more importantly, it keeps the two sides genuinely matched, which the eye is far better at auditing than the hand is at reproducing.
Turn it off near the end. Perfect symmetry is the tell that something is computer-generated: real faces are not symmetrical, and a final pass of deliberately asymmetric detail — a slightly higher brow, an off-centre scar, uneven wear — is most of what makes a sculpt look alive.
Transpose
Transpose mode moves, rotates or scales whatever is not masked, using a gizmo. It is how you reposition a limb, lengthen a nose or rotate a jaw without re-sculpting it — mask the part that should stay, then swing the rest.
It is worth reaching for earlier than instinct suggests. A proportion problem is usually a transpose problem, and sculptors who only own brushes tend to try to fix proportions by adding material, which turns a five-second correction into an hour.
The gizmo parks itself in the middle of the unmasked region, which is right for a scale and wrong for most rotations: an arm masked off at the shoulder would swing about its own midpoint rather than about the joint. Pick the fourth tool, Pivot, and drag the handle wherever the turn should happen — nothing deforms while you place it — or press Snap to joint to drop it straight onto the mask border. Move, Rotate and Scale then all work from that point until you reset it.
Deform and mesh filters
Deform mode reshapes the entire object at once along a chosen axis, at a chosen amount: Bend, Twist, Taper and Stretch handle whole-form changes that would be tedious by brush. Inflate and Deflate puff or shrink the whole surface, Smooth relaxes everything, Sharpen crisps detail globally, and Noise lays fractal surface texture over the model.
These respect masks, which is what makes them precise rather than blunt. Mask the head, twist the torso. Mask everything but a cloak, add noise for cloth texture. A global filter plus a mask is often the shortest path to an effect that looks like an hour of hand work.
Booleans and trimming
Add and Cut combine objects: Add fuses one shape into another, Cut subtracts its volume. This is the fastest route to hard-surface elements on an organic sculpt — panel lines, sockets, bolt holes, an armour plate that needs to sit flush.
Trim cuts away whatever falls inside a shape you drag over the model — a lasso for freehand silhouettes, a box for straight cuts. It is how you slice a sculpt flat for a base, chop a limb to re-sculpt it, or crop away the parts of a blockout you have decided against. Escape cancels an armed trim or boolean before it runs.
Projects
Sculpting a head
The head is the sculpt everybody wants to make and the one that punishes shortcuts most, because everyone alive is an expert at reading faces. The order below is the one that works, and every step of it is about resisting the urge to sculpt features too early.
- 1Start with a mass, not a face — Take a sphere, turn on symmetry (X), and Grab it into an egg — wider at the cranium, narrower at the chin. Getting this basic volume right does more for the final likeness than any amount of nose work.
- 2Find the skull landmarks — With a big Clay brush, establish the brow ridge, the cheekbones, the jaw line and the temples. These are bone; they do not move, and everything soft hangs off them. If the skull is wrong the face cannot be right.
- 3Cut the eye sockets — Push the sockets in before you make any eyes. Eyes sit deep in holes — beginner heads look wrong most often because the eyes were sculpted onto the surface rather than into a socket.
- 4Block the nose and mouth as wedges — A nose is a wedge before it is a nose; a mouth is a cylinder wrapped around the teeth. Get the volumes and their placement right, then refine.
- 5Subdivide, then refine features — Press D and start refining — eyelids, lips, nostrils, the ear. Now the finer brushes earn their keep: Dam (E) for the lid crease and the lip line, Pinch (8) to sharpen.
- 6Break the symmetry — Turn X off and introduce asymmetry — one eye slightly higher, the mouth a little off-centre, uneven skin detail. This is the step that turns a mannequin into a person.
Check it upside down
Rotate the head so it is inverted, or view it in a mirror. Your face-recognition instinct switches off and you suddenly see the shapes as they actually are — errors you have stared past for an hour become obvious immediately.
Sculpting for 3D printing
A model destined for a printer has requirements a render never has, and they are easy to satisfy if you know them in advance and painful to retrofit if you do not.
The mesh must be watertight — a single closed surface with no holes, no gaps and no faces that overlap themselves. A slicer has to be able to tell inside from outside, and an open mesh makes that question meaningless. This is the single most common reason a sculpt fails to print, and the fix in Mold is a voxel Remesh, which rebuilds the surface as one continuous watertight shell.
Detail has to survive physical reality. Fine work below roughly 0.4 mm at final scale will not resolve on a filament printer, and undercuts and thin spikes need support material or they will fail mid-print. Resin printers hold much finer detail, which is why miniatures are printed on them.
Thin projections are the other classic failure: a sword blade, a whisker, an outstretched finger. If it looks fragile on screen, it will snap in your hand — thicken anything delicate before exporting, however wrong it looks in the render.
- 1Finish the sculpt — Get the form and the detail where you want them. Print preparation is the last step, not something to worry about while sculpting.
- 2Remesh to make it watertight — In Mesh mode, run Remesh. This rebuilds the sculpt as one closed surface, which is what a slicer needs.
- 3Thicken the fragile parts — Inflate or Clay anything thinner than about 2 mm at print scale — fingers, blades, antennae, tails.
- 4Decimate if the file is huge — Slicers do not need millions of triangles. Decimate keeps the silhouette while dropping the count to something manageable.
- 5Export STL — STL is the standard 3D-printing format and the one every slicer accepts. Mold also exports OBJ and GLB.
Export is the paid step
Sculpting, remeshing and decimating are all free. Downloading the mesh — STL, OBJ or GLB — is part of a Mixos paid plan, so you can take a model all the way to print-ready before deciding.
Finish & export
Texturing a sculpt
A sculpt is geometry — shape, and nothing else. Colour, roughness, metal and the rest are texture, and in Mixos they are Paint's job. One click unwraps the sculpt with fresh UVs and opens it in Paint, the layer-based PBR painter, where you paint materials, add masks and wear, and export standard map sets for Blender, Unreal, Unity, Cinema 4D and the rest.
That handoff is revision-proof in the direction that matters: sending an updated sculpt back at a different detail level does not throw away the paint work you have already done. Changing the base cage still forces a rebuild, but iterating on detail does not.
If texturing is new to you, how to texture a 3D model is the companion to this manual, and the full Mixos manual covers Paint the way this one covers Mold.
Exporting your sculpt
Mold exports GLB, OBJ, STL and FBX. GLB and OBJ keep your objects separate and named, so a multi-object sculpt opens in Blender as distinct objects rather than one fused lump. STL has no concept of objects and fuses everything — which is exactly right for printing and wrong for anything else.
An export covers every visible object, so hiding a mesh is how you leave it out. Face sets travel with GLB and OBJ, and a rigged sculpt exports as a skinned GLB with the geometry at rest and the pose carried by the bones.
Sculpting and saving are free; downloading the mesh is on the paid plans. Sending a sculpt to Paint for texturing stays free, so the whole authoring path — blockout to detailed sculpt to textured model — costs nothing until you want the file itself.
Rigging and posing
Rig mode builds a skeleton, binds it to the mesh and poses it. Place bones down a limb, end a chain, mirror the skeleton across the symmetry axis, then bind — Mold works out the weights, and you can smooth them where the deformation pinches.
The usual reason to pose a sculpt is presentation: a character standing in a neutral T-shape reads as a work in progress, while the same sculpt with weight on one leg reads as finished. Keep pose bakes the current pose into the geometry; Rest returns to the bind pose.
Keyboard shortcuts
Brushes
- Draw
- 1
- Inflate
- 2
- Smooth
- 3
- Grab
- 4
- Flatten
- 5
- Clay
- 6
- Scrape
- 7
- Pinch
- 8
- Crease
- 9
- Twist
- 0
More brushes
- Snake hook
- K
- hPolish
- H
- Trim
- T
- Dam
- E
- Stamp
- B
- Layer
- L
- Nudge
- N
- Morph
- O
- Mask
- M
Brush & view
- Shrink the brush radius
- [
- Grow the brush radius
- ]
- Toggle symmetry
- X
- Toggle the wireframe overlay
- W
- Orbit even over the mesh
- Altdrag
Resolution & history
- Subdivide — add a level
- D
- Step down a level
- ,
- Step up a level
- .
- Undo
- CtrlZ
- Redo
- Ctrl⇧Z
- Cancel an armed boolean or trim
- Esc
Modes
- Sculpt
- ⇧1
- Mask
- ⇧2
- Transpose
- ⇧3
- Mesh
- ⇧4
- Deform
- ⇧5
- Rig
- ⇧6
Frequently asked questions
Is 3D sculpting hard to learn?+
Less than most people expect. Sculpting borrows an intuition you already have from working clay, so beginners usually make recognizable shapes within an hour — unlike polygon modeling, where the first hour goes on learning edge loops. What is genuinely hard is seeing accurately, which takes the same practice drawing does. Expect about three months of short regular sessions to get comfortable; thirty minutes daily beats a five-hour Saturday.
How do I start learning 3D sculpting?+
Open a sculpting tool, start from a sphere, and block a rough shape with a large clay brush before touching any detail. Learn six brushes rather than sixty — build, smooth, move, crease, sharpen, flatten. Then sculpt simple observed objects (an egg, an apple, a pebble), move to anatomy in parts, and sculpt a skull before you attempt a face. The most common mistake is studying software features instead of practicing form.
What is the difference between 3D sculpting and 3D modeling?+
Modeling is technical — you place vertices, draw edge loops and extrude faces, which suits objects you can describe with measurements. Sculpting is intuitive — you push, pull and smooth a surface with brushes, which suits organic shapes you can only describe by looking at them. Most artists use both: sculpt the form, then build clean geometry over it.
Do I need to know anatomy to sculpt characters?+
For anything that reads as a person or creature, yes — and it is the highest-return study you can do. One good artistic-anatomy reference will outperform any amount of software tutorial once you are two weeks in. Sculpting a skull once improves every head sculpt you make afterwards, because you finally know what is under the surface.
How many polygons should a sculpt have?+
As many as the detail requires and no more. Blocking happens at a few thousand triangles; a detailed sculpt runs into the millions. What matters is that you only subdivide once the broad shape reads correctly — more triangles never rescue a wrong silhouette, they just make it expensive to change. Decimate before exporting if the file is unwieldy.
Can I 3D print something I sculpt?+
Yes, with two preparations. The mesh must be watertight — one closed surface with no holes or self-overlapping faces — which a voxel remesh produces. And fragile parts must be thickened: anything below roughly 0.4 mm at final scale will not resolve on a filament printer, and thin spikes snap. Export STL, which every slicer accepts.
Do I need an expensive computer to sculpt in 3D?+
Not to start. A browser-based sculpting tool runs on any machine whose browser provides WebGPU, including Chromebooks, iPads and Android tablets that cannot run desktop sculpting packages at all. Hardware decides how far you can push a dense detail pass, not whether you can sculpt — blockouts and mid-detail work are comfortable on a tablet.
Is there a free way to learn 3D sculpting?+
Yes. Mold is free to sculpt in — every brush, all the subdivision levels, remeshing, masking and symmetry, with no time limit and no watermark, using a free account. Exporting the finished mesh is the paid step, so you can learn the whole discipline without paying for anything.
Everything in this manual runs in a browser tab — free to sculpt, nothing to download.
Start sculpting