How to texture a 3D model
Texturing turns a gray 3D model into something that reads as metal, wood, fabric, or skin. This guide walks through the modern PBR approach — layering materials and masks on the mesh, then exporting maps your renderer or game engine can use — without any desktop install.
The short answer
The modern workflow: import your mesh, lay down base PBR materials, isolate parts with masks, add detail and wear, then bake and export standard PBR maps. You can do the whole thing in a browser with Mixos — free to author.
Step by step
- 1
Import your model
Export your mesh from your 3D app as glTF/GLB, FBX, or OBJ and import it into your texturing tool. Clean UVs help, but triplanar projection lets you start even without them.
- 2
Lay down base materials
Add a base PBR material to the whole model or to specific parts — metal, plastic, wood — to establish the overall read before any detail.
- 3
Isolate parts with masks
Use color-ID, procedural, or painted masks to confine each material to the right surfaces, so the handle is leather and the frame is steel.
- 4
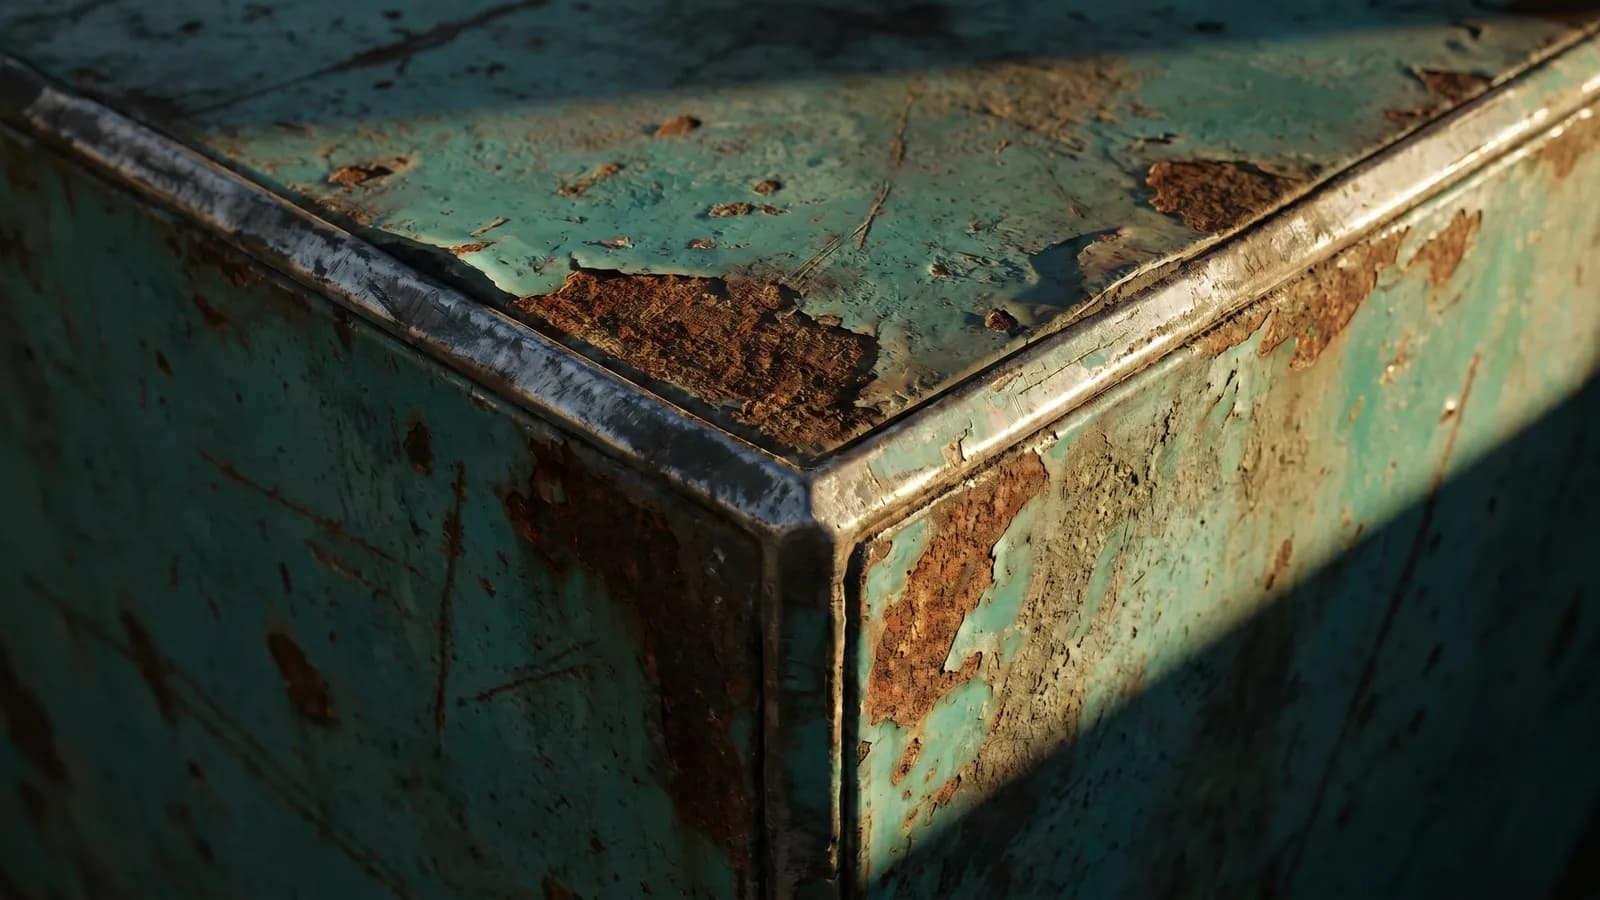
Add surface detail and wear
Stack layers for grime, edge wear, scratches, and dirt. Driving wear from baked curvature and AO makes it land where a real object would actually scuff.
- 5
Check it under lighting
Rotate the model in a real-time PBR viewport and watch how roughness and metalness read under light. Adjust until it's convincing from every angle.
- 6
Bake and export your maps
Export a standard PBR set — base color, roughness, metallic, normal, height, AO — plus a .glb, then wire those maps into your engine's material.
Do I need clean UVs?
Helpful, but not required to start. UVs give precise control and are needed for clean baking, but triplanar projection tiles materials on any mesh, so you can begin texturing immediately and refine UVs later.
From blockout to final
Texturing is iterative. Block in the big materials first, get the silhouette of the surfaces reading right, then layer in the fine detail. Resist polishing one corner before the whole model reads correctly — it's the fastest way to waste effort.
Frequently asked questions
Do I need expensive software to texture a 3D model?
No. A browser-based tool like Mixos gives you layered PBR texturing, mesh-map baking, and 4K export — free to author, with nothing to install.
What file should I export my model as?
glTF/GLB is the most reliable for texturing handoff; FBX and OBJ also work. Export the finished maps back as a PBR set plus a .glb.
How long does texturing take?
A simple prop can be textured in minutes with smart materials or AI auto-texturing; a hero asset with hand-painted wear takes longer. Starting from a material library speeds it up a lot.
Try every step in your browser — import a model and texture it free with Mixos.