Set the hierarchy early
Choose a dominant material, one supporting material and a small accent. Generate a readable first pass before adding fine scratches or decals.
AI autotexture for props
Radios, tools, crates and tabletop objects carry a scene's history. Use Auto to establish their materials and wear, then refine the details that make each prop belong in your world.
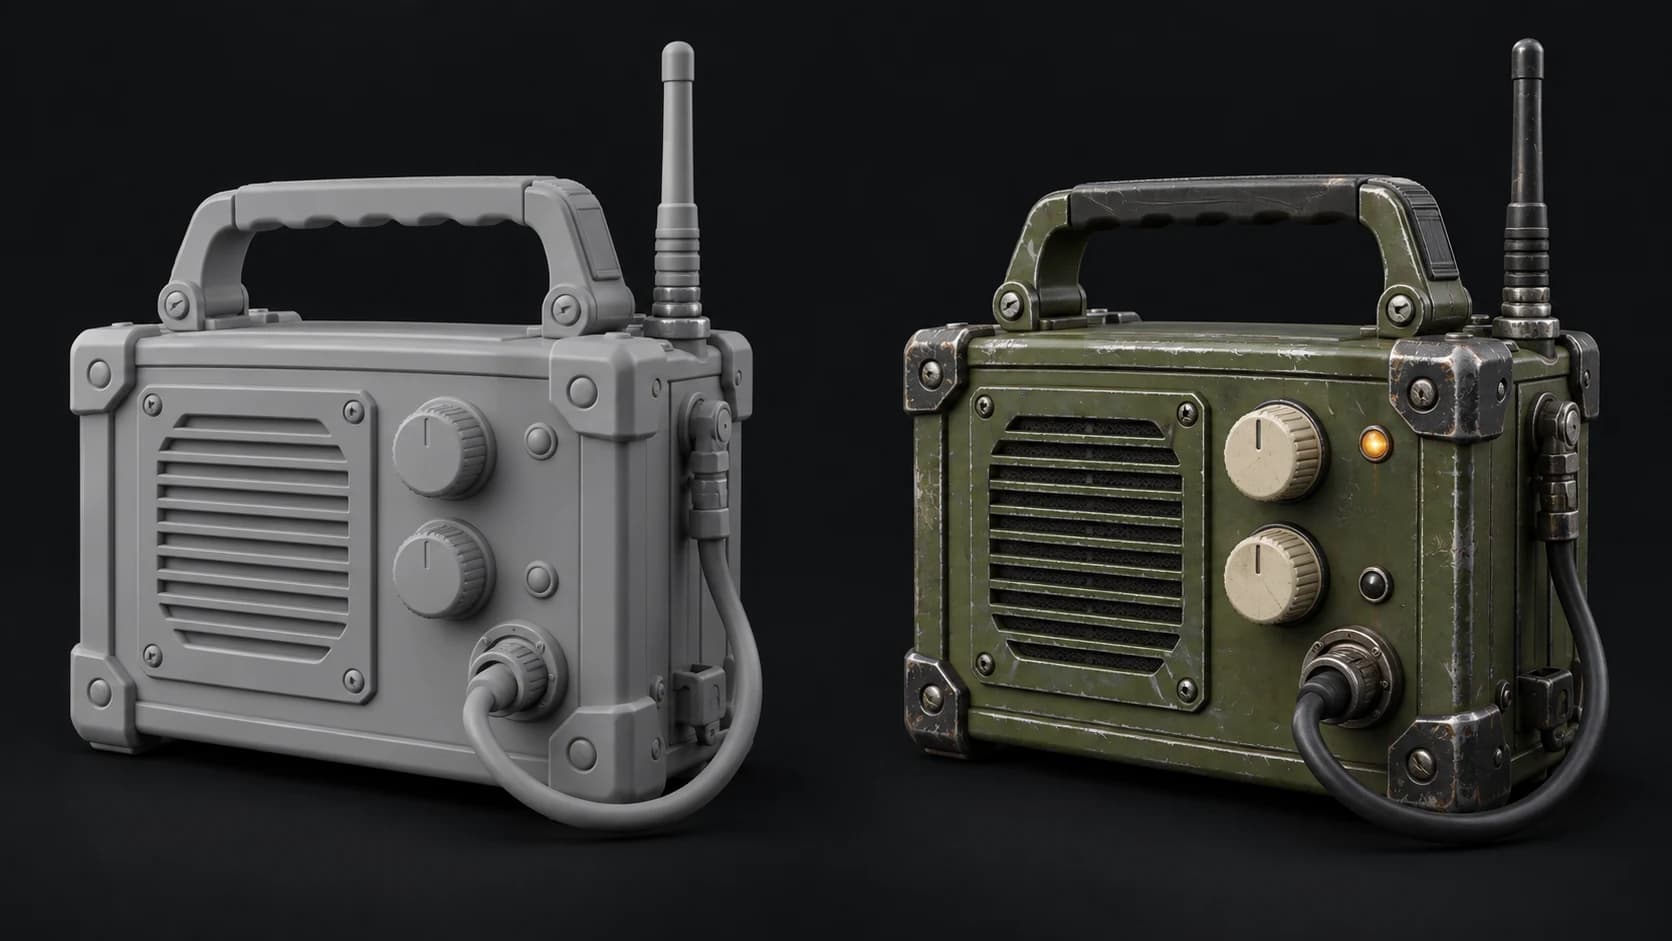
Choose a dominant material, one supporting material and a small accent. Generate a readable first pass before adding fine scratches or decals.
Attach a reference for palette, finish or weathering. Describe what to borrow so unrelated shapes and graphics do not become the brief.
Use Paint to separate material regions, soften overdone wear and add precise markings. The generated pass is the beginning of the layer stack.
Why Mixos
A close-up can hide a weak material design behind noise. At scene distance, the prop still needs a clear silhouette, a dominant color group and understandable construction. Start the prompt with what the object is made of and how its parts fit together; add aging only after that foundation is clear.
For a field radio, the housing, knobs, protective corners and cable should not all share one finish. Restrain edge wear to places that would be handled or knocked. Leave fine labels and repeated markings for a manual pass where placement and legibility are under your control.
A group of props benefits from a shared palette, but each needs its own material roles. Reuse a reference image and a short style brief while changing the object-specific instructions. Generate and inspect each asset individually; do not assume separate runs will return identical colors or roughness.
Decide which parts are painted metal, raw metal, wood, fabric or rubber. Keep the first brief focused.
Run Auto, then inspect the entire object. Check handles, underside surfaces and small fittings for stretched or missing detail.
Open Paint to adjust colors, mask materials and place exact detail. Review the prop at the distance it will appear in the scene.
Vintage field radio, olive enamel body, warm cream knobs, brushed steel corner guards, black rubber cable. Worn where hands touch it, dust in recesses, restrained palette, no text.
Static objects with readable shapes and distinct surface regions make useful first experiments: crates, tools, radios or simple set dressing. Recessed mechanisms and tiny graphics usually need more manual attention.
Use a consistent reference and repeat the palette and finish terms in each brief. Inspect and adjust each result, because separate generations are not guaranteed to match exactly.
Yes. Continue in Paint to add controlled detail over the generated base. This is useful for markings that must stay readable and sit in a precise location.
It produces a texture pass and derived maps. You still need to validate topology, texture budgets, material setup and appearance in your game engine.
Read next
The whole pass, from import to exported maps.
The maps a modern material is made of, and what each one does.
Why the same texture reads bigger on one model than another.
Drop the files in and see the material lit, in the browser.
Keep exploring
AI game asset texturing
AI autotexture for OBJ
Reference-guided AI autotexturing
AI autotexture for furniture

Establish the finish quickly, then spend your attention on the details the scene actually needs.