Work from bare geometry
A material file is not required to describe a new finish. Start from the visible shape and assign a clear role to metal, plastic, rubber or wood in the prompt.
AI autotexture for OBJ
Bring a bare OBJ into Auto and describe what it is made of. Build a first texture pass across the mesh, check it in 3D and refine the material with the full Paint layer stack.
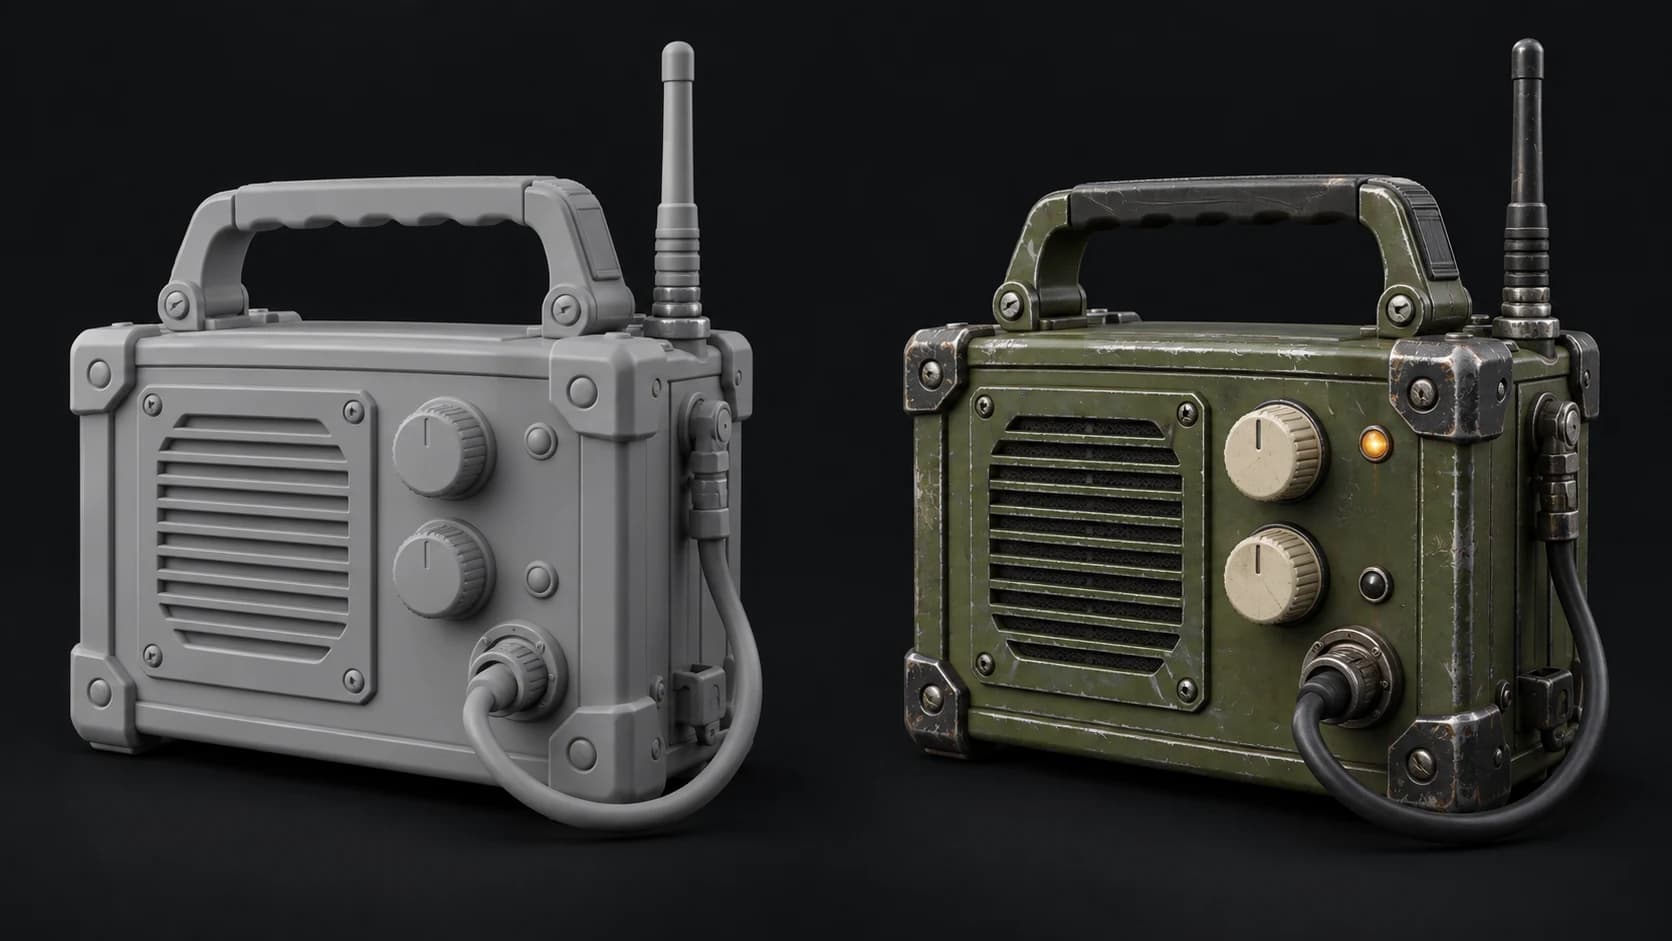
A material file is not required to describe a new finish. Start from the visible shape and assign a clear role to metal, plastic, rubber or wood in the prompt.
Auto handles missing UVs and can replace stacked or tiled layouts. Inspect the prepared result when an existing UV template matters to your project.
Export maps on a paid plan, then connect them in your destination material. Use the returned model if preparation changed the original UV layout.
Why Mixos
An OBJ is often the simplest way to move a static mesh between tools. It can arrive without usable materials, with a missing MTL file or with references to images you no longer have. For a new texture direction, the important starting point is the mesh: its form, orientation and material boundaries.
A good prompt follows the object rather than listing unrelated effects. For a radio, separate its painted housing from the knobs, antenna and rubber cable. Keep damage proportional to its size. Those distinctions make it easier to judge whether the generated surface supports the model or merely adds noise.
Check the atlas before reusing the textures on the original OBJ. Automatically prepared UVs may differ from your source layout. A texture that looks correct on the returned mesh can land on the wrong parts when paired with the old UVs; use the matching model or rebake through your usual DCC workflow.
Confirm normals, orientation and the parts you want to texture. Keep the source OBJ and any original material files together.
Describe the housing, fittings and flexible parts separately. Choose a restrained palette so the object remains readable from a distance.
Inspect seams in Paint, download the result on a paid plan and verify that the mesh and texture set use the same atlas.
Portable field radio with a faded olive enamel housing, cream control knobs, brushed steel corner guards and a black rubber cable. Subtle handling wear, no labels or symbols.
Not to generate a new texture direction from the mesh. An MTL and its image files matter when you want to preserve or inspect an existing material setup, so keep them with your source asset.
Yes, missing UVs can be unwrapped automatically. That creates a layout for the generated textures; it does not recreate a missing original UV template.
Only if the UV layout matches. Auto may prepare a new atlas. Use the corresponding output mesh or rebake the result when your original topology and UVs must stay fixed.
Yes. Continue in Paint to add layers, masks and local corrections. AI credits cover generation; downloading your files requires a paid plan.
Read next
The whole pass, from import to exported maps.
The maps a modern material is made of, and what each one does.
Why the same texture reads bigger on one model than another.
Drop the files in and see the material lit, in the browser.
Keep exploring
AI autotexture for GLB
AI autotexture for props
Online texture painter
AI autotexture for FBX
Give your static mesh a material pass you can rotate, refine and take into the next stage.