AI 3D modeling

AI 3D modeling.
Keep shaping the idea.

Describe a model, inspect it in a live 3D viewport, then ask for the next change. Mixos AI works with editable geometry, separate objects and materials, so your first prompt can become a project you keep refining.

  • Editable scene
  • Browser workspace
  • Manual editing in Studio

Mixos AI is available in this build. Conversational tools require paid access or purchased credits.

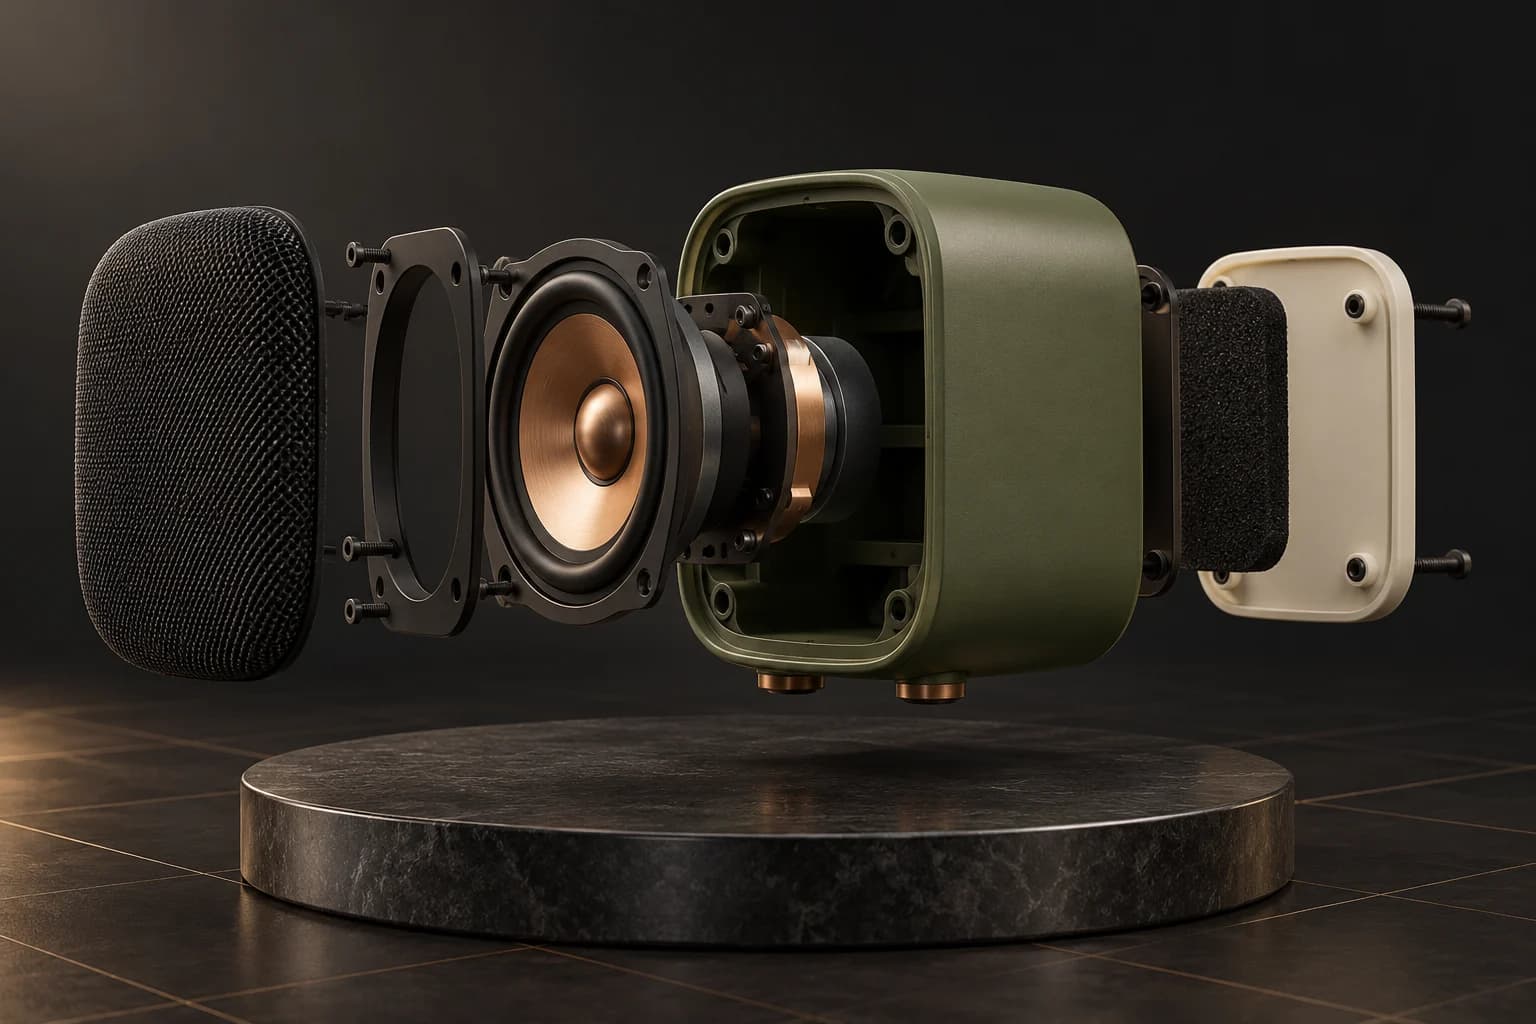
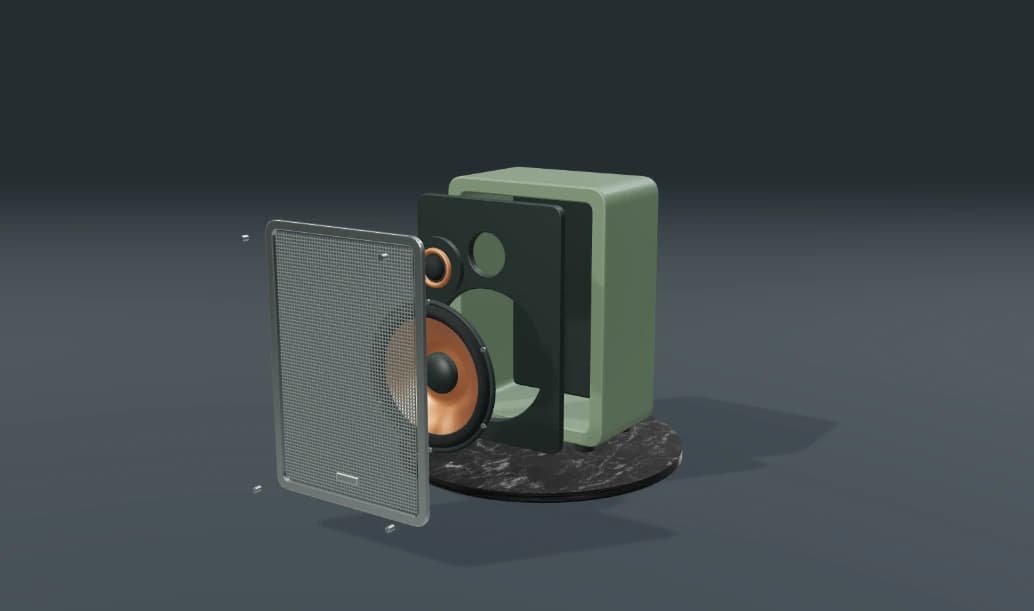
Exploded concept of an olive studio speaker with a copper driver and separate enclosure, grille and back panel A CREATIVE STARTING POINT
Think in parts. Refine the whole.AI-generated concept illustration
01 / HOW IT WORKS

A modeling conversation you can see.

Start with a recognizable shape and a few concrete requirements. The assistant uses the scene's modeling tools, and the viewport lets you check proportions and placement before asking for more detail.

  1. 01

    Describe the shape

    Name the object, its proportions and the parts you need to edit separately. A compact speaker with a rounded enclosure and an inset driver gives the assistant a clearer starting point than a style word alone.

  2. 02

    Change one thing

    Make the enclosure wider, move the grille or switch the surface to brushed copper. Review the actual objects in the viewport, then continue the conversation or undo a turn.

  3. 03

    Take it further

    Save the scene, continue editing by hand in Studio, or compose a render. Explicit automatic mesh generation is another route when you want a textured asset from text or a reference image.

02 / INSIDE MIXOS

See the scene as you work.

The viewport makes the result visible. Inspect the shape, placement and materials before moving on to the next change.

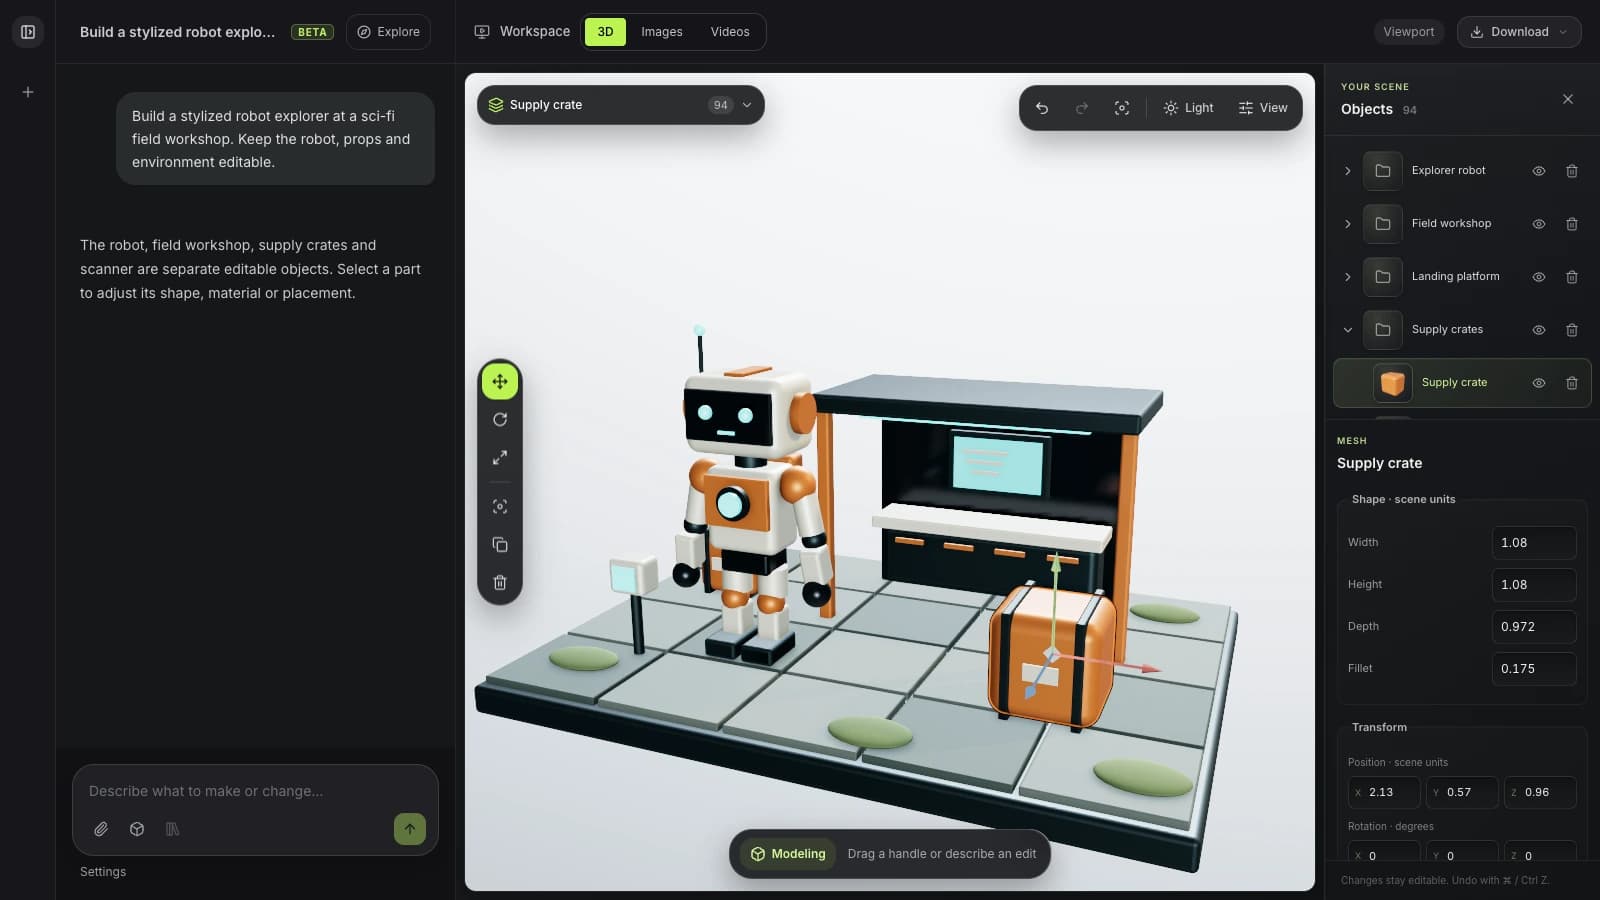
Current Mixos AI interface with chat, an editable explorer robot, field workshop and supply crate inspector
Actual Mixos AI interface with 94 editable objects in a prepared outpost scene. The example conversation is scripted; object properties edit the live scene.
FROM SCENE TO IMAGE

Build the scene.
Explore the finish.

Keep the robot, workshop and props editable in 3D. Use that view as the starting point for an image with richer surfaces, lighting and atmosphere.

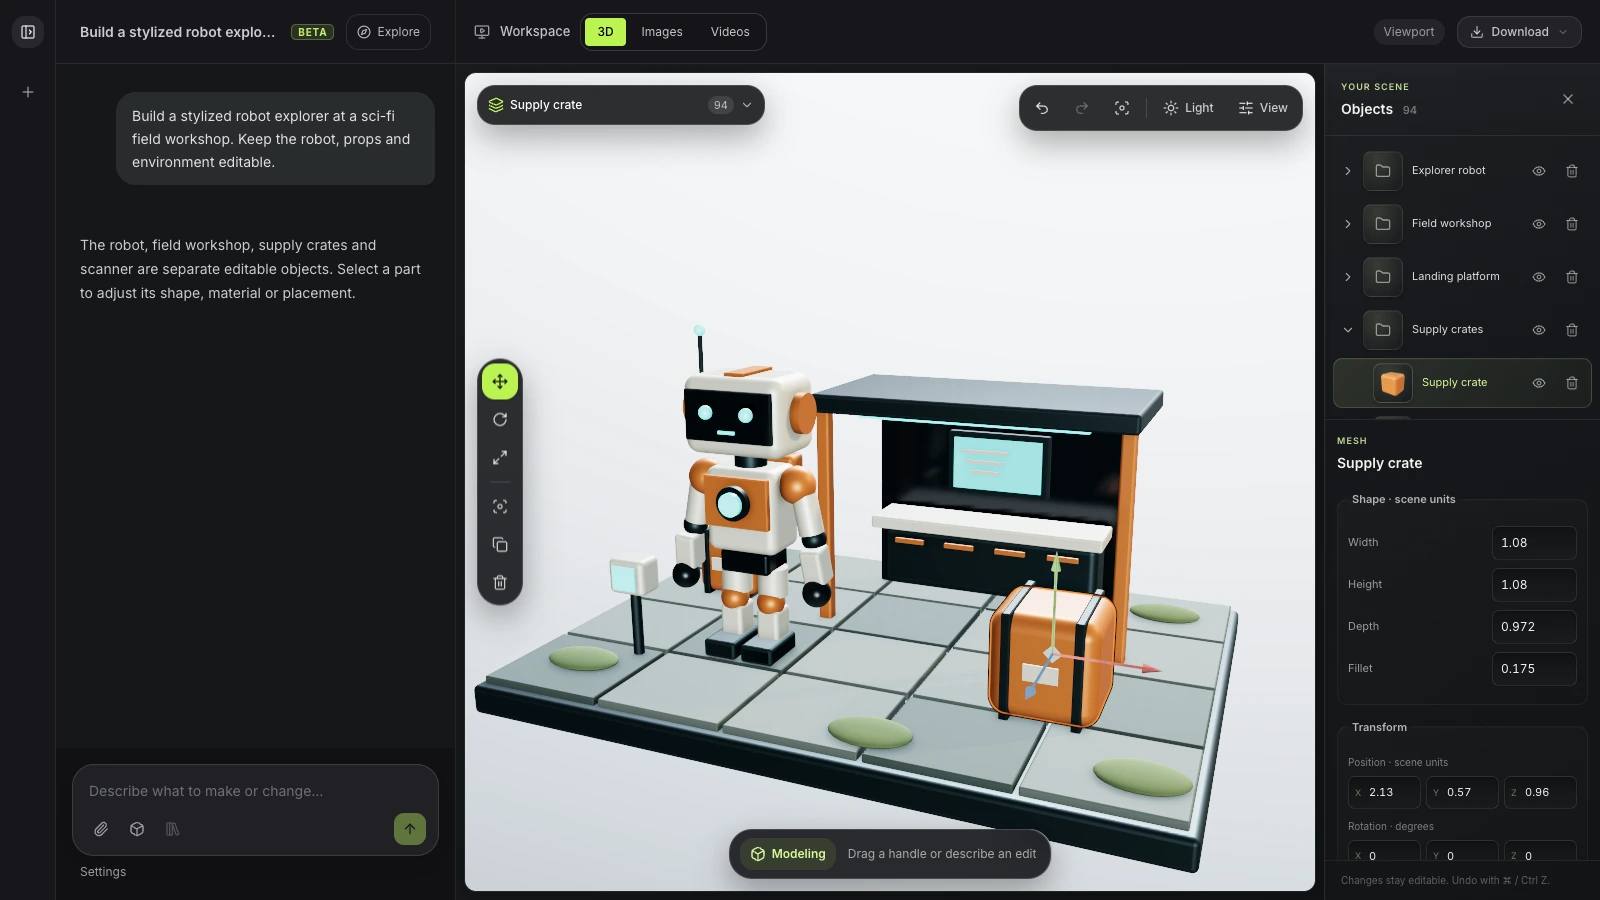
Mixos AI workspace with an ivory explorer robot, field workshop and orange supply crate built as separate editable objectsReal app screenshot
1 · The editable scene94 objects in the current workspace. Prepared scene and example conversation.
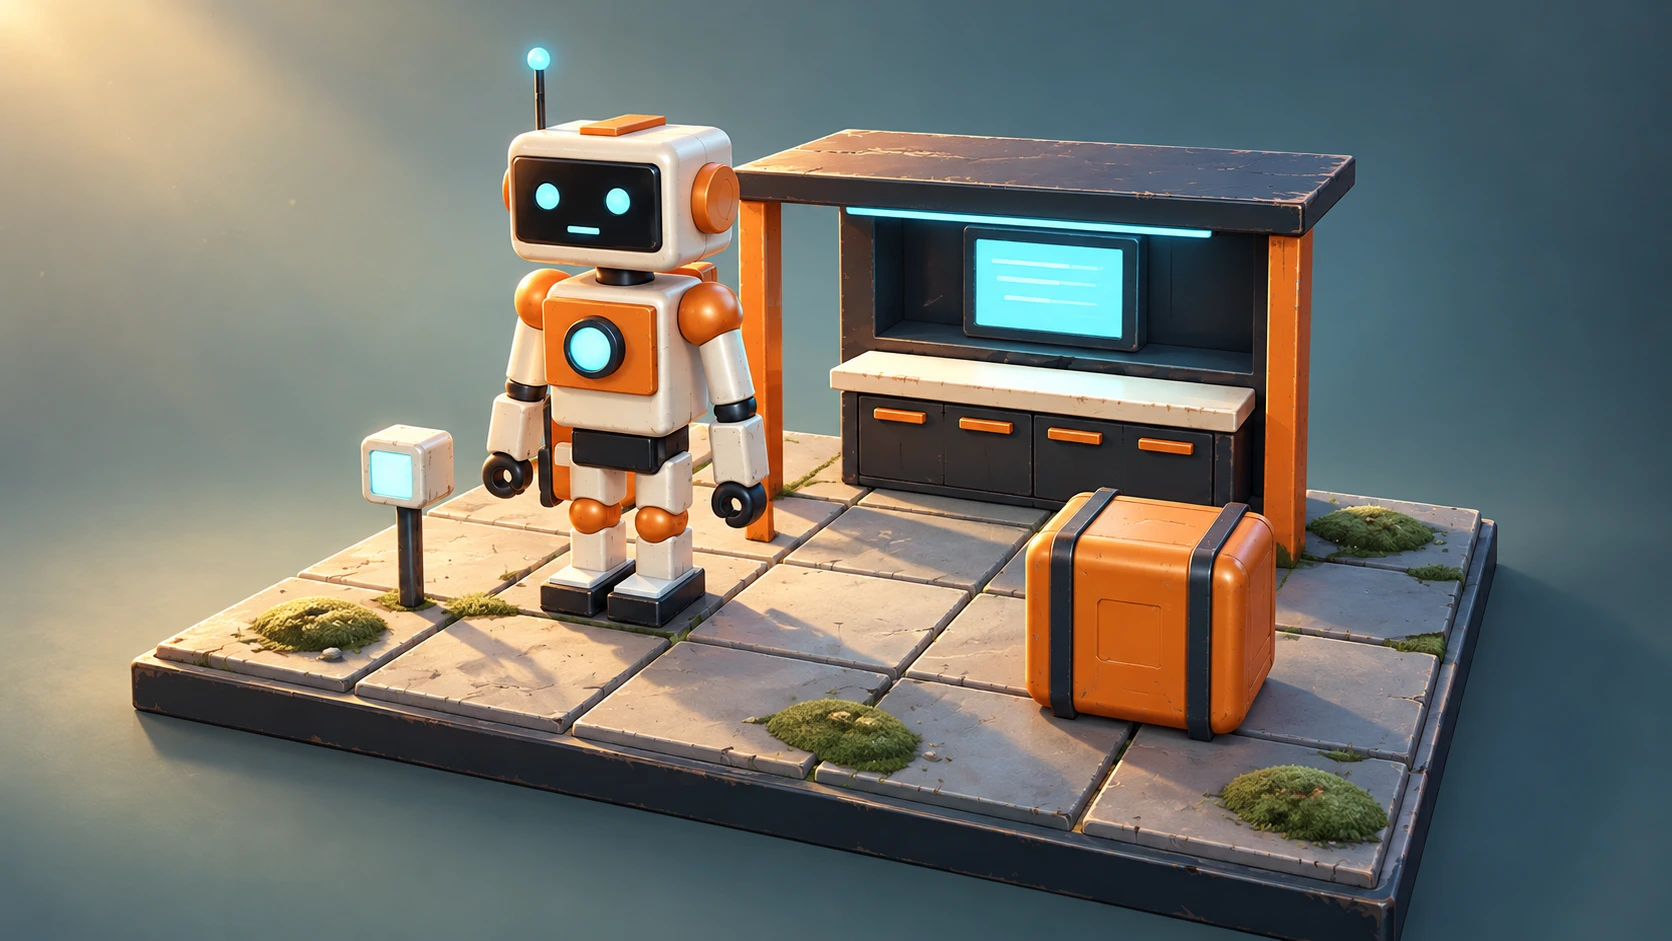
Illustrative AI finish of the same robot outpost arrangement with worn painted metal, moss-covered tiles and warm cinematic lightingIllustrative AI finish
2 · A finished art directionGenerated with ImageGen using the workspace capture as a reference.

This comparison illustrates the scene-to-image workflow. The finished image was created for this page with ImageGen; it is not a capture of an in-app generation. AI interpretation can change details.

03 / FIND YOUR STARTING POINT

Choose how your model takes shape.

01

Build editable geometry

Ordinary modeling requests use the modeling tools in the open scene. This suits product forms, blockouts and objects whose dimensions, components or placement you want to keep changing. Ask for separate parts where you need independent control.
02

Generate a textured mesh

When you explicitly request automatic generation, a paid model engine can create an asset from text or an image. Inspect the resulting geometry and materials before relying on it. Generated topology and fine details vary; a generated asset is not a guarantee of a clean production mesh.

03

Refine the scene around it

A model is only one part of a useful scene. Change its materials, add lights, set a camera and place it beside other objects. You can move between conversational changes and manual Studio edits as the project develops.

BUILD A PRODUCT
“Build a compact speaker with a rounded olive enclosure, copper driver and dark grille. Keep the enclosure, driver and grille as separate objects.”
Open Mixos AI
REFINE A PART
“Make the enclosure wider. Keep the driver centered, move the grille slightly forward and give the driver a brushed copper finish.”
Open Mixos AI

Example briefs to adapt to your project. Concept images show a creative direction; live results depend on your prompt and the tools used.

SEE THE WORKFLOW

Five examples. See what changes with each prompt.

Build, finish and animate real 3D scenes. Choose an example, play the walkthrough or jump to any step.

Inside the speakerPrepared example · no credits used
THE BRIEF

“Build a compact studio speaker with an olive enclosure, a copper driver and a fine metal-mesh grille. Keep the components separate.”

BUILD → FINISH → ANIMATE

Pull it apart. Tell the story.

The chat explains the change. The viewport shows the result. Play all steps, or use the numbered controls to explore.

Inside the speaker — prepared 3D scene
ASSEMBLYCLICK TO FOLLOW THE STORY
The finished scene3D SCENE PREVIEW

Prepared walkthroughs with editable 3D, animation and illustrative AI images. Prompts and replies are scripted; playback uses no credits. AI video generation is a separate paid step, illustrated above.

04 / A FEW USEFUL ANSWERS

Questions about ai 3d modeling

Is Mixos AI available now?

Mixos AI is available in this build. Open the workspace with your Mixos account; conversational tools require paid access or unspent purchased credits. The expanded creation workspace is rolling out in preview builds.

What is AI 3D modeling?

AI 3D modeling uses an assistant or a generative model to help create and change 3D geometry. In Mixos AI, conversational modeling operates on the editable scene. Explicit text-to-3D or image-to-3D generation creates a mesh through a separate paid model engine.

How is conversational modeling different from text-to-3D generation?

Conversational modeling edits objects and geometry in the current scene, so you can ask for changes to individual parts. Text-to-3D generation produces an asset from a prompt. Both can be useful: build for control over components, or generate a starting mesh and inspect it before further work.

Can I edit the model after the AI creates it?

Yes. Scene objects remain editable, and you can continue working in Studio. The kind of edits available depends on the object: separate modeled components can be adjusted independently, while a generated mesh may require mesh editing or cleanup.

Is this an AI CAD tool for manufacturing?

Mixos is a creative 3D workspace. Use it for visual models, scene building and product concepts. Do not assume a generated mesh has engineering tolerances, validated dimensions or fabrication-ready topology; inspect the output in the tools required by your project.

Do I need to install Blender or configure MCP?

No. The Mixos AI preview combines chat and a live viewport in the browser. You can use the released Studio app for manual modeling today. External Blender or MCP setup is optional, not required for this workflow.

What is free, and what requires a paid plan?

Editing in the released Mixos apps is free with a Mixos account. AI generation consumes credits. Production exports require a paid plan or licence; the free plan includes a 512px watermarked render preview. See Pricing for current allowances. Watching the demonstrations on this page does not spend AI credits.

See Pricing for current AI credits and export allowances. Studio is available now for manual 3D creation.

YOUR NEXT PROJECT STARTS HERE

Describe the idea.
Keep creating.