Start with the model you have
Open a GLB directly in the browser. Check the silhouette and orientation before describing colors, materials and wear for the whole object.
AI autotexture for GLB
Turn an untextured GLB into a material direction you can inspect from every angle. Auto paints the model from a prompt, derives PBR maps and gives you a path into layers and manual refinement.
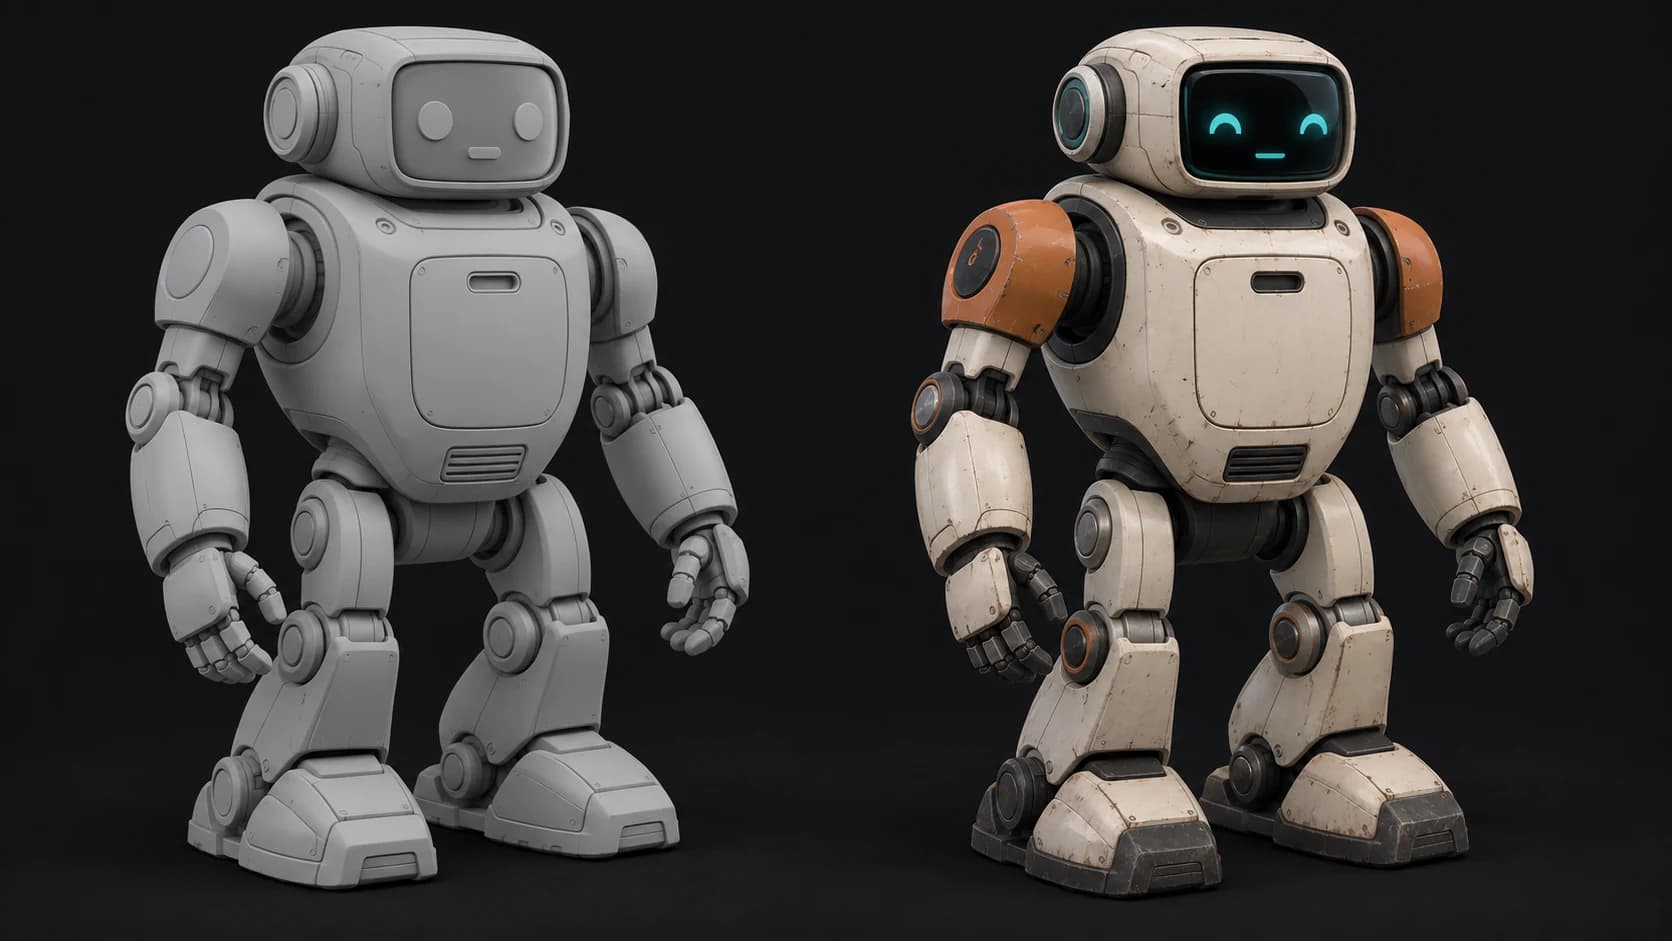
Open a GLB directly in the browser. Check the silhouette and orientation before describing colors, materials and wear for the whole object.
Rotate the textured mesh rather than approving a single picture. Look at the rear, underside and small details before taking the result further.
Open the result in Paint to adjust material channels, add masked detail and repair seams. On a paid plan, download a textured GLB and texture maps.
Why Mixos
GLB is a convenient handoff because a model can travel in a single file. Its existing materials, however, may be placeholders, an unfinished scan or a look that no longer fits the project. AI autotexturing gives that geometry a new surface direction without asking you to paint every panel before you can evaluate it.
Mixos renders the mesh from multiple viewpoints, generates coordinated painted views and projects them into a UV texture atlas. Color becomes the basis for derived material maps. This is a generated first pass: recessed parts, fine lettering and abrupt material boundaries deserve a close inspection in the 3D viewer.
Keep a copy of the source GLB. Auto can combine parts, replace unsuitable UVs or simplify very large meshes during preparation, so this is not a promise of an unchanged rig, scene hierarchy or vertex count. If the source file contains animation, validate your downstream handoff separately.
Load the GLB, confirm that all intended parts are present and rotate it to understand which surfaces need different materials.
Name the main surface, contrasting parts and restrained wear. Add a reference image when you have a specific palette or finish in mind.
Check all sides, refine the result in Paint and choose the export your next tool needs. Downloading requires a paid plan.
Compact service robot with ivory painted body panels, orange shoulders, graphite rubber joints and a teal glass face. Fine dust in recesses, light edge scuffs, no lettering.
Yes. You can use an existing model as the starting point for a new look. Save the source first and inspect the generated result; it is a new surface pass, not a guaranteed pixel-by-pixel edit of the original materials.
Auto can unwrap missing UVs and prepare layouts that are unsuitable for projection. If a specific UV layout is part of your delivery requirements, compare the prepared model with the source before continuing.
You preview the texture on the 3D model. Paid plans support downloading the textured GLB and maps; you can also continue editing the surface in Paint.
A free account includes trial AI credits. Generation uses credits, and file downloads require a paid plan. Check the current balance and pricing before starting a run.
Read next
The whole pass, from import to exported maps.
The maps a modern material is made of, and what each one does.
Why the same texture reads bigger on one model than another.
Drop the files in and see the material lit, in the browser.
Keep exploring
AI autotexture for OBJ
AI autotexture for FBX
AI autotexture for robots
Reference-guided AI autotexturing

Upload the model, describe its finish and inspect the result on the actual surface.